KW45xx and K32W1xx Load NBU image#
This notebook describes how to load NBU image to KW45xx/K32W1xx device.
Keys preparation#
First we need to generate Root of Trust Keys (RoTKs)/Super Root Keys (SRKs) and optionally Image Signing Key (ISK). In this example, we will use nxpcrypto app to generate secp384r1 keys (see How-to-get-keys-using-nxpcrypto). Script by default load 4 RoTKs and 1 ISK. Feel free to modify it according your needs. At least one RoTK is mandatory.
See the script’s comments and modify the script according to the application security requirements.
Based on loaded keys, ROTK value is calculated and loaded in the device fuses so that’s why keys cannot be changed anymore for the device.
Some EKV boards have already burnt fuses for RoTK (CUST_PROD_OEMFW_AUTH_PUK) and SB3KDK (CUST_PROD_OEMFW_ENC_SK), you can find these values in EVK_keys folder. In this example, we will have the EVK board with burnt fuses.
%run ../init_notebook.ipynb

import os
import pprint

pp = pprint.PrettyPrinter(indent=4)

WORKSPACE = "workspace/"  # change this to path to your workspace
KEYS = "../_data/keys/ecc384/"  # change this to path to your keys
EVK_KEYS = "EVK_keys/"
INPUTS = "inputs/"
VERBOSITY = (
    "-v"  # verbosity of commands, might be -v or -vv for debug or blank for no additional info
)
# choose family (kw45b41z8, kw45b41z5 or k32w148)
FAMILY = "kw45b41z8"
env: JUPYTER_SPSDK=1
Created `%!` as an alias for `%execute`.
# load generated key pair for ROTK0
ROTK0_PRIVATE_KEY_PATH = EVK_KEYS + "RoT_key0_secp384r1_kw45xx.pem"
ROTK0_PUBLIC_KEY_PATH = EVK_KEYS + "RoT_key0_secp384r1_kw45xx.pub"
# verify that keys were loaded
assert os.path.exists(ROTK0_PRIVATE_KEY_PATH)
assert os.path.exists(ROTK0_PUBLIC_KEY_PATH)

# load generated key pair for ROTK1
ROTK1_PRIVATE_KEY_PATH = EVK_KEYS + "RoT_key1_secp384r1_kw45xx.pem"
ROTK1_PUBLIC_KEY_PATH = EVK_KEYS + "RoT_key1_secp384r1_kw45xx.pub"
# verify that keys were loaded
assert os.path.exists(ROTK1_PRIVATE_KEY_PATH)
assert os.path.exists(ROTK1_PUBLIC_KEY_PATH)

# load generated key pair for ROTK2
ROTK2_PRIVATE_KEY_PATH = EVK_KEYS + "RoT_key2_secp384r1_kw45xx.pem"
ROTK2_PUBLIC_KEY_PATH = EVK_KEYS + "RoT_key2_secp384r1_kw45xx.pub"
# verify that keys were loaded
assert os.path.exists(ROTK2_PRIVATE_KEY_PATH)
assert os.path.exists(ROTK2_PUBLIC_KEY_PATH)

# load generated key pair for ROTK3
ROTK3_PRIVATE_KEY_PATH = EVK_KEYS + "RoT_key3_secp384r1_kw45xx.pem"
ROTK3_PUBLIC_KEY_PATH = EVK_KEYS + "RoT_key3_secp384r1_kw45xx.pub"
# verify that keys were loaded
assert os.path.exists(ROTK3_PRIVATE_KEY_PATH)
assert os.path.exists(ROTK3_PUBLIC_KEY_PATH)
Generate/Load SB3KDK#
To generate SB3KDK use the below script. Key generation can be done only once on the beginning, then is SB3KDK key loaded in device fuses and key cannot be changed anymore for device. EKV boards have already burnt fuses for RoTK (CUST_PROD_OEMFW_AUTH_PUK) and SB3KDK (CUST_PROD_OEMFW_ENC_SK), you can find these values in EVK_keys folder.
# import binascii
# # Generating SB3KDK:
# SB3KDK_KEY_PATH = WORKSPACE + "sb3kdk.txt"
# with open(SB3KDK_KEY_PATH, "wb") as f:
#     f.write(binascii.b2a_hex(os.urandom(32)))

# Loading SB3KDK
SB3KDK_KEY_PATH = EVK_KEYS + "sb3kdk.txt"
assert os.path.exists(SB3KDK_KEY_PATH)
Prepare SB3.1 configuration file#
In order to generate SB3.1 file, npximage tool is used. The nxpimage tool generates the SB3.1 file according to the configuration file. Let’s create a template for SB3.1. Modify examples according your needs.
SB31_TEMPLATE_DEFAULT_PATH = WORKSPACE + "sb31_config_default.yml"
%! nxpimage $VERBOSITY sb31 get-template -f $FAMILY -o $SB31_TEMPLATE_DEFAULT_PATH --force
assert os.path.exists(SB31_TEMPLATE_DEFAULT_PATH)
nxpimage -v sb31 get-template -f kw45b41z8 -o workspace/sb31_config_default.yml --force
Creating workspace/sb31_config_default.yml template file.
For signed container scenario, we need to create a certificate blok separately. In order to do this, use nxpimage cert-block get-template command as described below.
CERT_BLOCK_TEMPLATE_DEFAULT = WORKSPACE + "cert_block_default_kw45.yaml"
%! nxpimage $VERBOSITY cert-block get-template -f $FAMILY -o $CERT_BLOCK_TEMPLATE_DEFAULT --force
nxpimage -v cert-block get-template -f kw45b41z8 -o workspace/cert_block_default_kw45.yaml --force
Creating workspace\cert_block_default_kw45.yaml template file.
In our case, we modified these items in the certification block configuration template:
CERT_BLOCK_TEMPLATE = INPUTS + "cert_block_kw45.yaml"
assert os.path.exists(CERT_BLOCK_TEMPLATE)
Choose whether you want to use ISK. If so, define the path to the ISK public key.

Define paths to keys and choose index of main certification key.

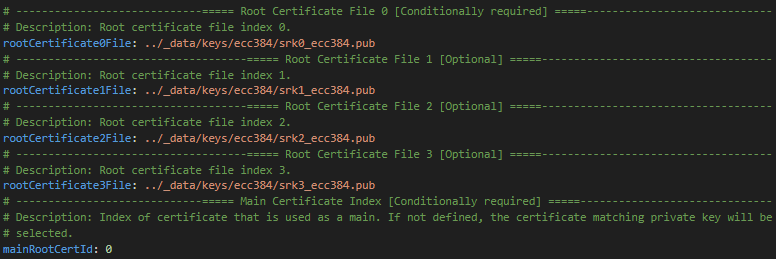
Define output path where certification block will be saved.

Our case does not require the definition of the following items, but it would be appropriate to consider their use for the given case.

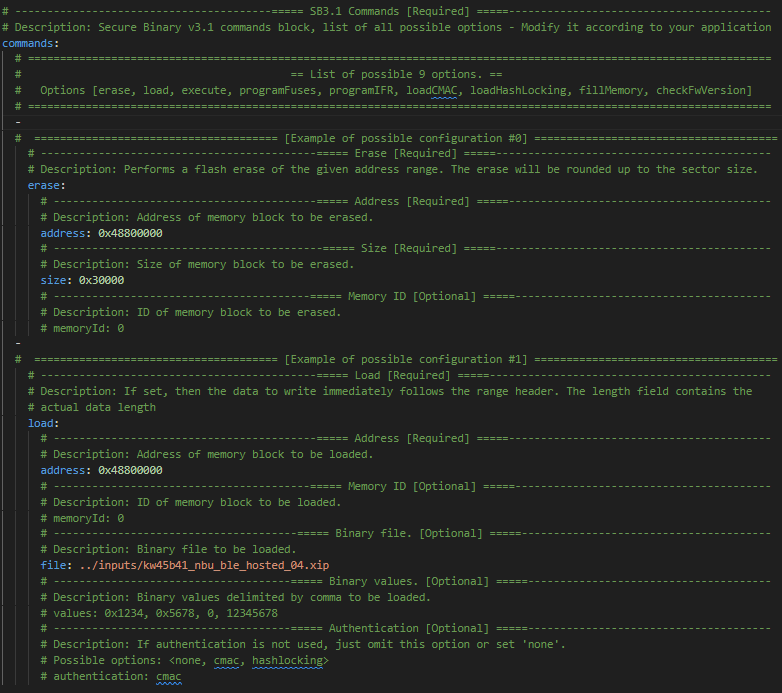
In our case, we modified these items in the SB3.1 configuration template:
SB31_TEMPLATE_PATH = INPUTS + "sb31_config.yml"
assert os.path.exists(SB31_TEMPLATE_PATH)
Define output path where final sb31 file will be saved.

Define path to the main certificate private key or signature provider.

Define path to the certificate block.

Specify path to the SB3KDK that was generated in the previous steps.

Value of KDK is used as key properties for key derivation process.

We used the commands erase to erase specified size of flash and load to load the file to the defined memory address.
SB3.1 generation#
We have created certificates and keys required for the creation of SB3.1 file. Let’s create a SB3.1.
SB31_FILE_PATH = WORKSPACE + "sb3.sb3"
%! nxpimage sb31 export -c $SB31_TEMPLATE_PATH
assert os.path.exists(SB31_FILE_PATH)
nxpimage sb31 export -c inputs/sb31_config.yml
RKTH: 650d8097079ff27a3e8a2da14781b922fd8295b6c00bfa067f00e87f1a16b8b304bf710d45cbd591e2e24be83183922c
Success. (Secure binary 3.1: workspace\sb3.sb3 created.)
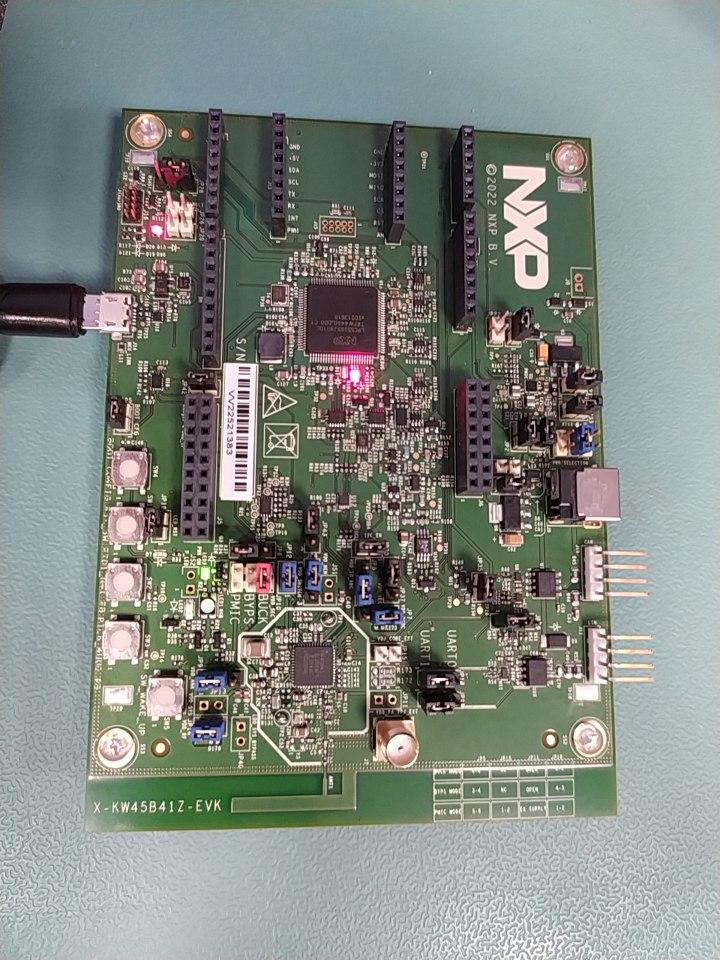
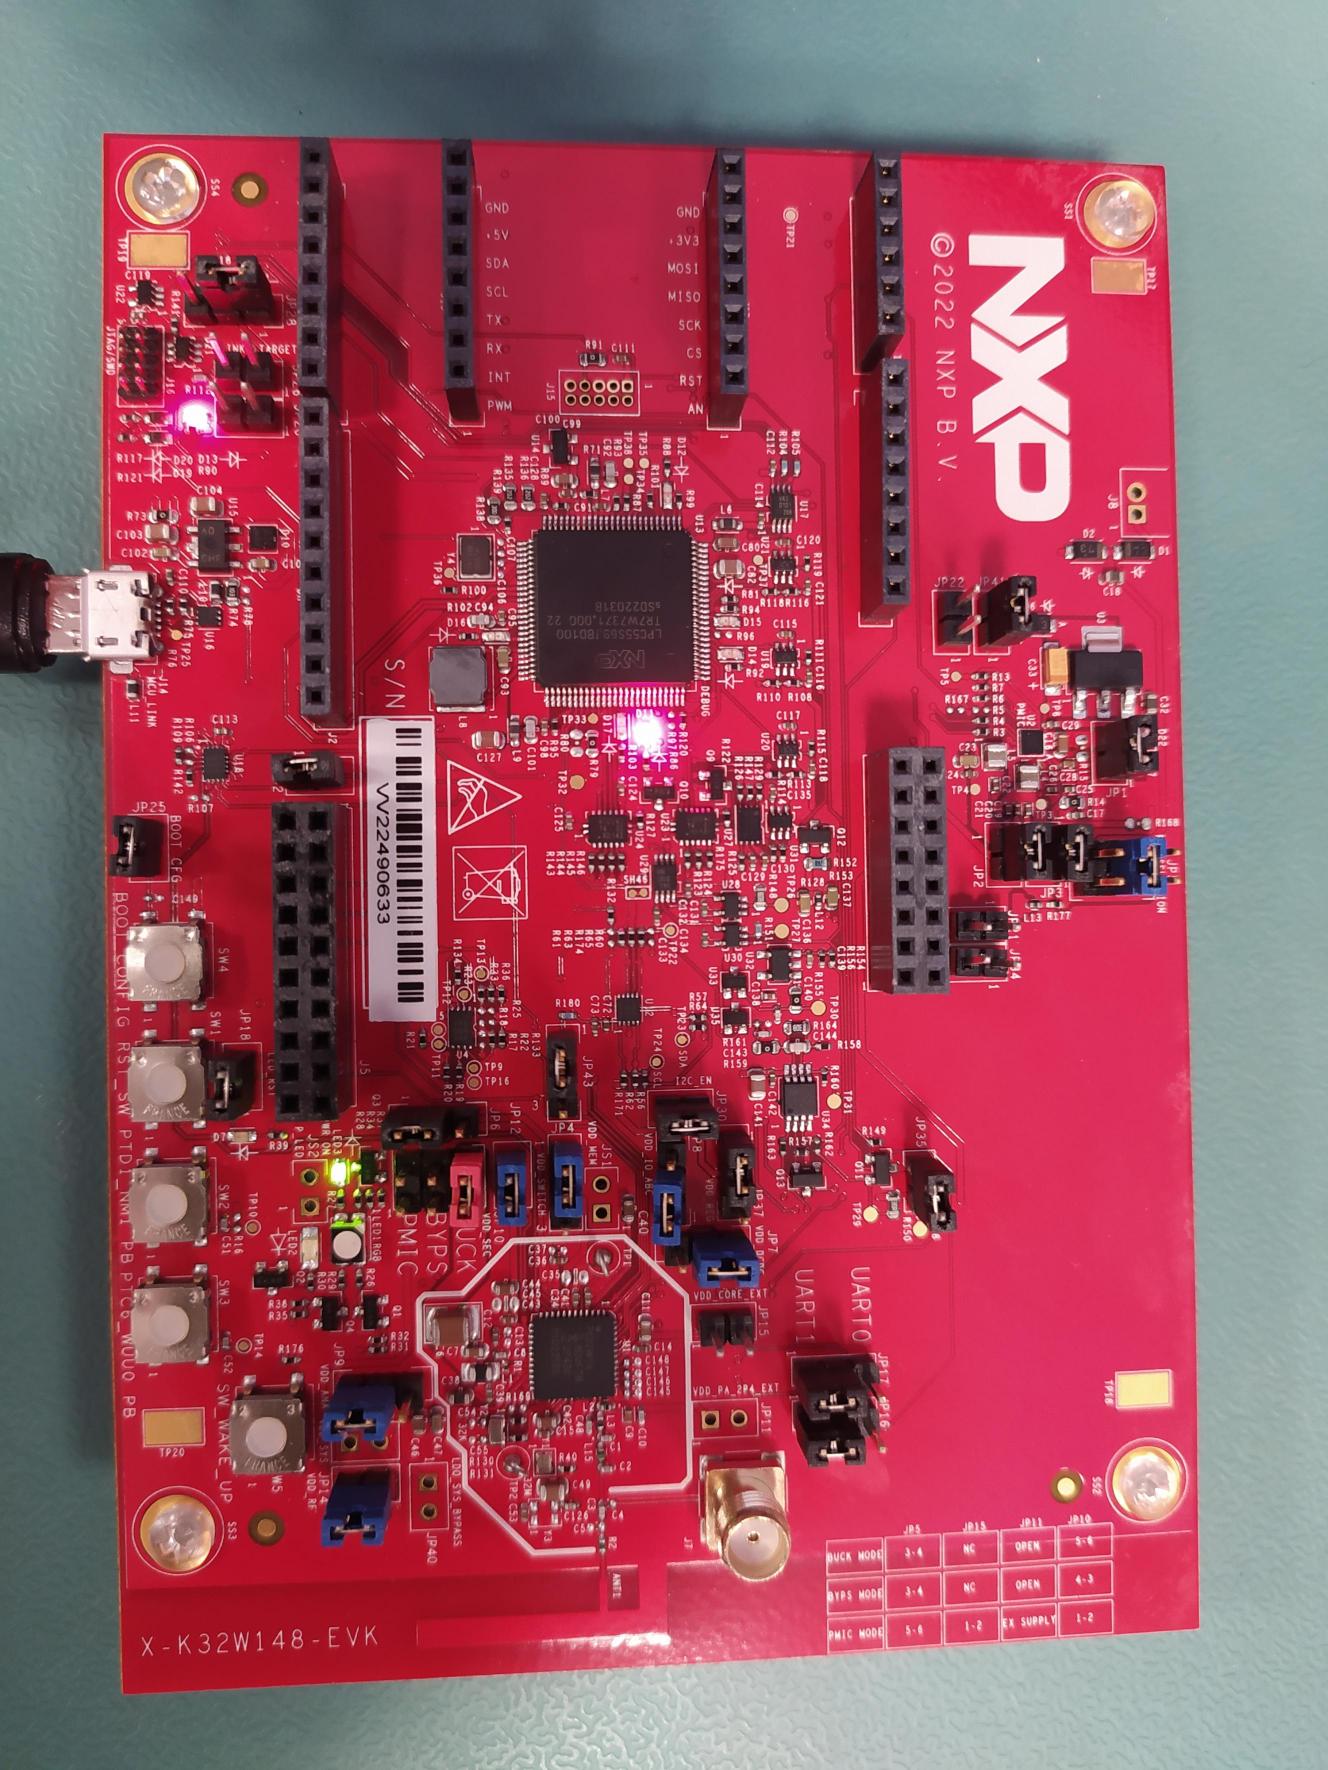
Device preparation#
Now it’s time to prepare the device. In this example we will use KW45xx-EVK/K32W1xx board.
First step is to enter ISP mode, this could be achieved by:
1 ) Put JP25 to (1-2)
2 ) Reset the board with SW4 pressed
Use app nxpdevscan to check if the device is connected to the PC in ISP mode.
# check if the device is connected and detected by PC
%! nxpdevscan
nxpdevscan
-------- Connected NXP USB Devices --------

-------- Connected NXP UART Devices --------

Port: COM10
Type: mboot device

-------- Connected NXP SIO Devices --------

-------- Connected NXP UUU Devices --------
# choose com port
UART_CONNECTION = "-p com10"

%! blhost $UART_CONNECTION get-property current-version
blhost -p com10 get-property current-version
Response status = 0 (0x0) Success.
Response word 1 = 1258488064 (0x4b030100)
Current Version = K3.1.0
Program device fuses with keys/RKTH generated in previous steps#
WARNING!!! In our case, we already have burnt these fuses on EVK
To program fuses blhost tool is used. Device needs to be in ISP mode, where it can communicate with blhost and process blhost commands. To serve the purpose of this document, ISP communication only over UART peripheral is considered for scripts. Also, accurate COMx port must be used.
WARNING!!! This step is destructive operation (burning fuses), be sure that you set values of SB3KDK and RoTKH correctly in script as printed in output from nxpimage
# Increase voltage for fuse burning
blhost $UART_CONNECTION set-property 0x16 1

# Program SB3KDK (CUST_PROD_OEMFW_ENC_SK)
# Put value SB3KDK generated by nxpimage
blhost $UART_CONNECTION fuse-program 0x20 [[c2d3eafa44cedc1edf237a7655acf18a1f41e85ea605dcc3bf473e4618b7882f]]

# Program RKTH (CUST_PROD_OEMFW_AUTH_PUK)
# Put value RKTH generated by nxpimage
blhost $UART_CONNECTION fuse-program 0x1F [[89e4983eb79bed26fc25cf6ba9b89ddb6727c80ed7c786a6f3c77c09bba0e832b468895926a6568031c0f955a614434e]]

# Set voltage to normal value
blhost $UART_CONNECTION set-property 0x16 0
Send SB3.1 file to device#
Last step is to uploads SB3.1 file with NBU image to device.
# uploads SB3.1
%! blhost $UART_CONNECTION receive-sb-file $SB31_FILE_PATH
blhost -p com10 receive-sb-file workspace/sb3.sb3
Sending SB file
Response status = 0 (0x0) Success.